We strongly advise customers to avoid sharing their personal credentials to their Google Analytics accounts. Doing so is highly insecure but also becoming increasingly impractical as Google (and other services) implement mandatory multi-factor authentication mechanisms or personal device-based passkeys.
This guide shows you how to grant us secure access to your Google Analytics account in a way that keeps you in control, does not share personal credentials (like usernames and passwords), and grants the access we need to do our job.
Follow these steps to grant us access to your Google Analytics account:
1. Create and/or log in to your Google Analytics account. #
Go to https://analytics.google.com/.
If you already have an account with Google Analytics, simply log in and skip to the next step.
Otherwise, you’ll have to create a Google account, or choose an existing account and activate Google Analytics on your account.
You only have to create one if you don’t already have one, of course.
Use a strong password that you don’t use anywhere else and then save the username and password securely in a password manager.
Remember: This is your account. Giving someone else access can have dire consequences for your business. Never share the credentials with anybody you don’t completely trust!
2. Locate the relevant account. #
In Google Analytics, look at the selected property in the top bar.
If it doesn’t show the correct account and site (or “property”), click the arrow to open the property selector.

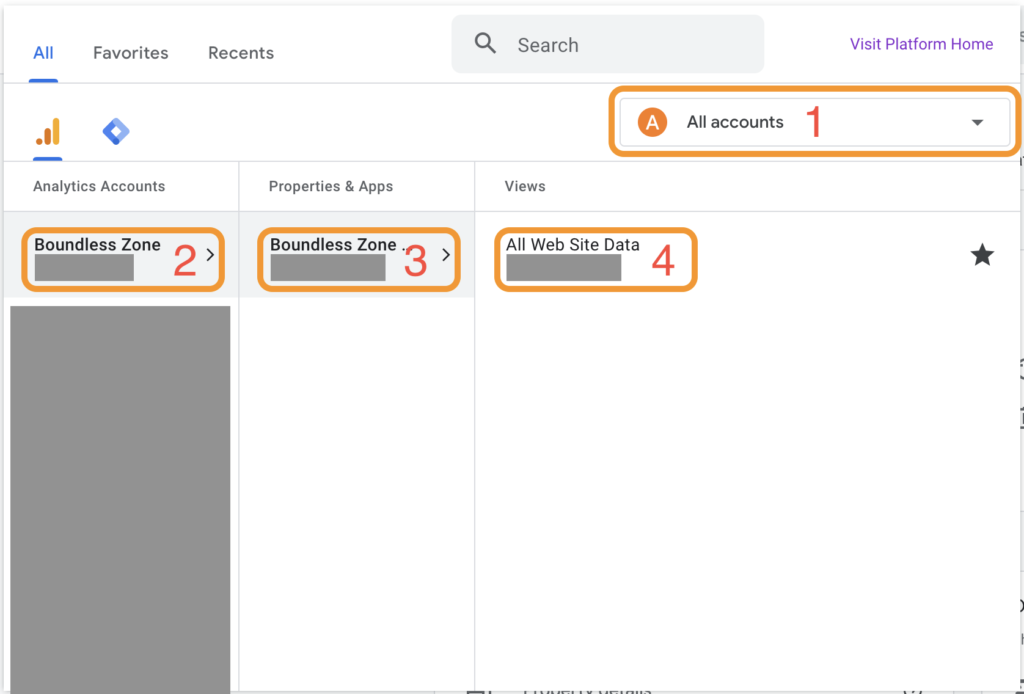
In the property selector popup, locate the relevant account by displaying All accounts using the dropdown at the top (#1), and then selecting the account (#2), the property (#3), and the view (#4).

3. Grant our user access. #
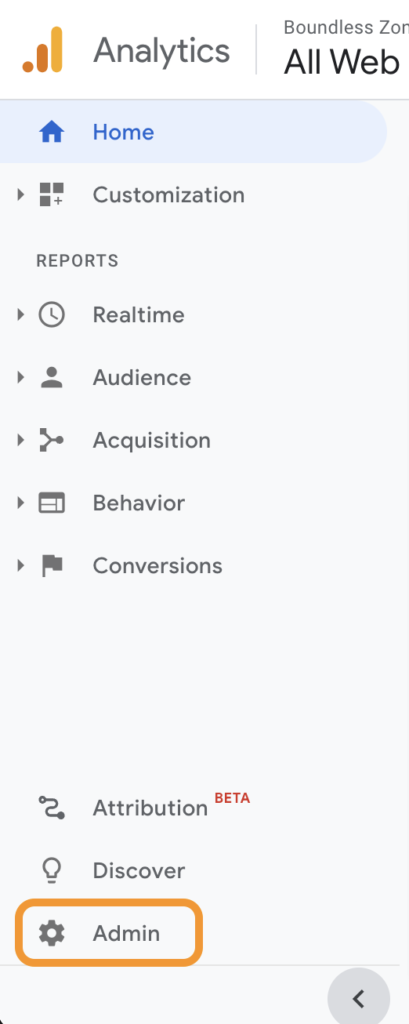
Click Admin in the menu on the left.
Note that if the menu is collapsed, you’ll only see the gear icon.

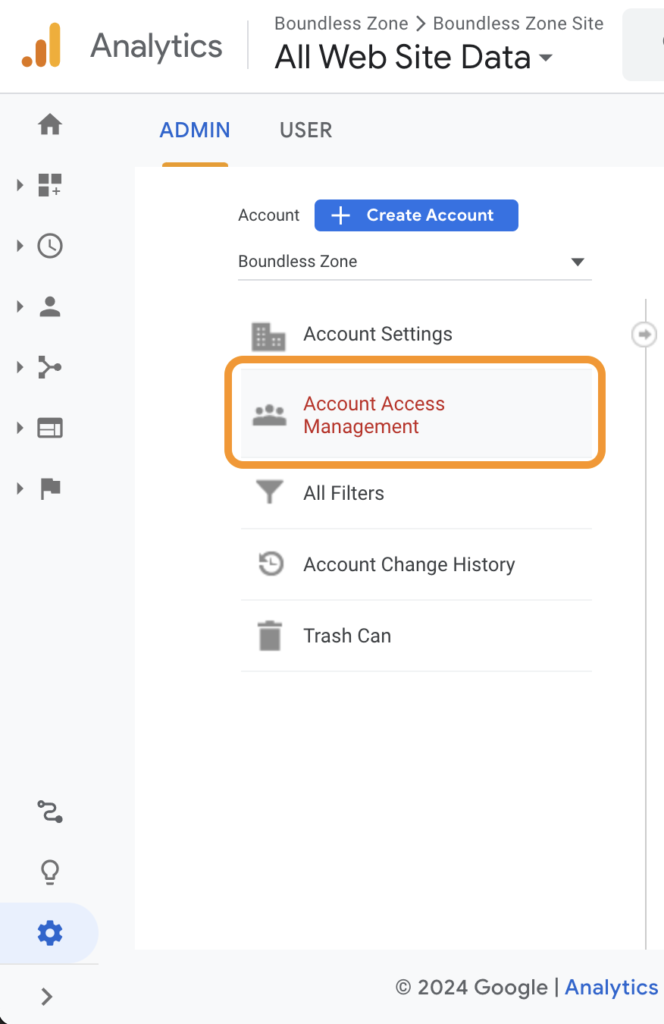
In the Account column (the first column), click Account Access Management to open the Account access management popup.

In the Account access management popup, click the plus icon and then Add users.

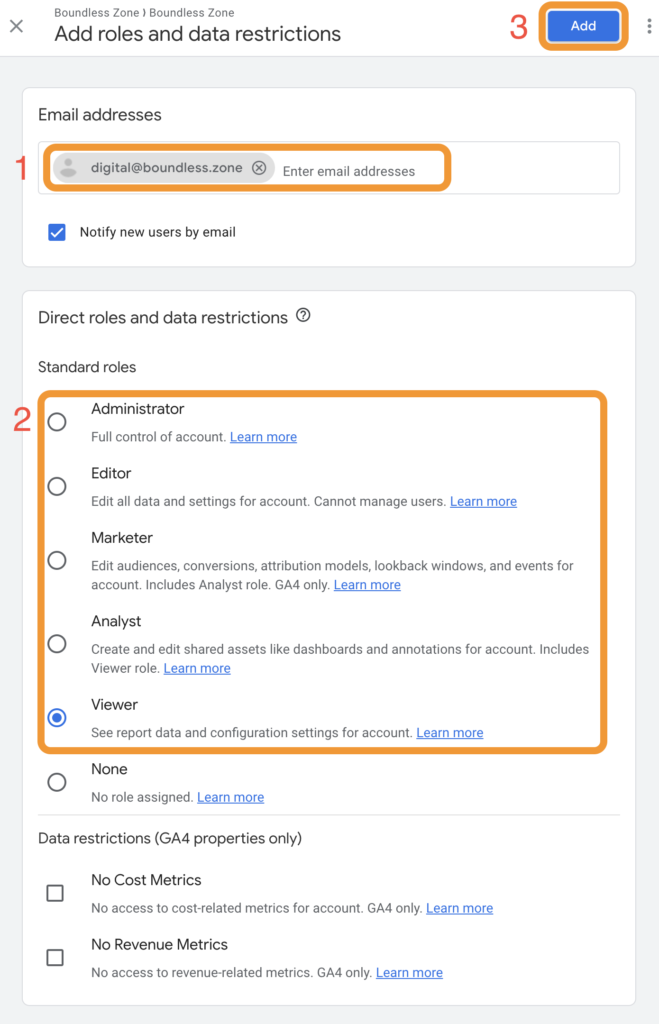
In the Add roles and data restrictions popup, fill in the following details:
- In the Email addresses field, enter the email digital@boundless.zone.
- In the Direct roles and data restrictions field, choose the role most appropriate for the task.
For example, for SEO audits, we can usually get by with the Viewer role. On the other hand, to manage your account, we typically require either the Editor or Administrator roles.
Please do not add Data restrictions.
Click Add.

4. You’re done. Now it’s our turn. #
As soon as the invitation comes through, we’ll be able to access your Google Analytics account with our user.


